
Session 4 — Your First AI Project
Duration: 60 min · Format: live online
What you'll learn: by the end, you can plan, build, and test your own image classifier that solves a real problem, and present it with a one-page summary.
Soft skill focus — Creativity
Today you'll also grow Creativity. The AI can sort pictures, but only a person can dream up what is worth sorting and which real problem to solve.
Try this: when you finish the sentence "My AI will sort ___ into ___ and ___," push past the sample ideas — come up with a project no one else in the room has thought of.
Think about: What made your project idea different from everyone else's?
What you'll need
- A webcam-ready device with Teachable Machine open.
- Paper and a pencil for your one-page summary.
- A few project ideas to pick from (recycle helper, ripe-fruit checker, toy sorter, tidy-desk checker).
Hook
You've learned what AI is, spotted patterns, and trained a model. Today you put it all together — what real thing would you want an AI to sort for you?
Have a think, then get ready for the mission: today you build a real AI project you can show someone.
Teach — Your mission and the four steps
Your mission is to build an AI that sorts pictures into groups to help with a real task, then show it to someone.
Look at this diagram:
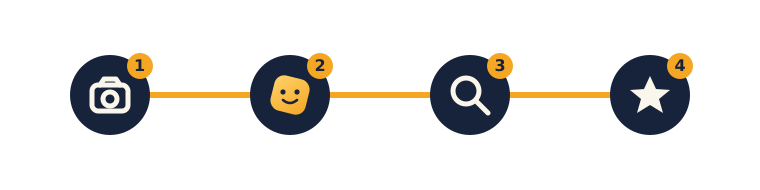
Here are the four steps:
- Collect — capture at least 20–30 pictures per class, with different angles, backgrounds, and lighting.
- Train — click Train Model and wait a few seconds.
- Test — show it new things; watch the confidence bars; find one it gets right and one it gets wrong.
- Show — make a one-page summary and present it.
Pick an idea. Here are some to start from — write yours down:
- Recycle helper:
papervsplastic - Fruit checker:
ripevsnot ripe - My toys sorter:
carsvsanimals - Tidy desk:
tidyvsmessy
⚠ Watch out — don't be over-ambitious: it's easy to pick groups that look almost identical, or too many classes at once. Choose two clearly different groups for a first project.
Finish this sentence: "My AI will sort __ into _ and ___."
Activity — Build it: collect, train, test
Open Teachable Machine → Image Project, make one class per group, and work through the steps.
- Collect: aim for 20–30 pictures per class using different angles, backgrounds, and lighting — variety makes it smart.
- Train: click Train Model and wait a few seconds.
- Test: show it new things, watch the confidence bars, and find 1 thing it gets right and 1 thing it gets wrong. Add more examples of the tricky ones and re-train — is it better?
Use this checklist as you work:
- [ ] Chose an idea and wrote it down
- [ ] Collected 20+ examples for each class
- [ ] Trained the model
- [ ] Tested it on new things
- [ ] Improved a tricky class and re-trained
Watch out for: a model trained on one background only (it learns the background, not the object); classes with very uneven numbers of pictures; forgetting to re-train after adding examples.
Check yourself
Try to answer these, then check yourself after the arrow.
- What are the four project steps? → Collect → Train → Test → Show.
- Your model gets a new picture wrong — what do you do? → Add more, varied examples of that tricky class and re-train.
- Why use different angles, backgrounds, and lighting when collecting? → Variety makes the model smarter so it recognises the object, not just one background.
Wrap-up
- Make a tiny one-page summary (draw or type): the project name, what it does (one sentence), the groups it sorts into, and one cool thing and one hard thing you learned.
- If you can, present your project for 1 minute to the class.
- Try this at home: finish the one-page summary and present the project to your family or the class. Well done — that completes Unit 1: you learned what AI is, how it spots patterns, and built and presented your own classifier.
Tips & extra challenges
- Watch out: it's tempting to think "a bigger score means the AI really understands." Accuracy just means how often it matched the patterns in the examples — it doesn't understand the objects.
- Want more? Try this: collect a real dataset — instead of the webcam, take real photos (e.g. 30 of paper, 30 of plastic) and upload them. Be honest about accuracy: test 10 new items, count how many it gets right (e.g. 8/10 = 80%), and write the score down. Then write a mini project brief (3 lines): the problem, the data used, the result (accuracy), and one idea to improve it.
Vocabulary
| Term | Meaning |
|---|---|
| Dataset | All the examples you collected |
| Accuracy | How often the AI is right |
| Improve | Make it better with more examples |
| Present | Show and explain your project |
Resources
- Teachable Machine — build and test the model.
- Teachable Machine — save & share — how to keep the project.
- Machine Learning for Kids — turn a model into a game (extension).
Practice set
Practise on your own — the answer comes after the arrow.
- What are the four project steps, in order? → Collect → Train → Test → Show.
- Which is the better first-project idea: (a)
catvsdog, or (b)golden retrievervslabrador? → (a) — the two groups look clearly different; (b) are so similar that a first model will struggle. - Your model gets a new picture wrong. What is your first move? → Add more, varied examples of that tricky class and re-train.
- You tested 10 new items and it got 8 right. What is the accuracy, and what does that number mean? → 80% — out of every 10 tries it is right about 8 times; it is not perfect.
- A "recycle helper" works on your desk but fails on a friend's table. Name the likely cause and two fixes. → It probably learned the background/lighting of your desk; fixes: collect examples on different backgrounds and in different lighting, then re-train.
- Write a one-line project brief for a "ripe-fruit checker": name the problem, the two groups, and one feature that separates them. → Any sensible answer, e.g. Problem: know if a banana is ready to eat; Groups:
ripevsnot ripe; Feature: colour (yellow vs green).
Going deeper (optional)
- Build an honest score sheet. After your model is trained, test 10 brand-new items you did not use for training and tally each as right or wrong on paper. Turn the tally into a percentage (7 of 10 = 70%). Then ask: "Which class did it get wrong most?" and add examples of just that class and re-test the same 10 items. Seeing the score move (or not) makes accuracy real and shows that improvement is measured, not guessed. This is the honest-testing habit that carries straight into Unit 2's work with data.
- Spot the hidden shortcut (bias). A model can look great for a sneaky reason. Imagine every
plasticphoto was taken on a blue table and everypaperphoto on a wooden one — the model may really be sorting tables, not materials. How would you catch this? (Test paper on the blue table.) How would you fix it? (Mix up the backgrounds.) This is a first taste of why fair, varied data matters.
Common mistakes & fixes
- Mistake: choosing two groups that look almost identical, or too many classes at once. → Fix: stick to two clearly different groups for a first project; you can add more later.
- Mistake: collecting every example on the same background, so the model learns the background. → Fix: capture varied angles, backgrounds, and lighting so it learns the object itself.
- Mistake: adding more examples but forgetting to re-train, then thinking it did not help. → Fix: always click Train Model again after changing the examples, then re-test.
- Mistake: testing on the same pictures used to train and claiming it is perfect. → Fix: test on new items; count honestly (e.g. 8 of 10) and write the real score down.
- Mistake: believing a high accuracy score means the AI truly understands the objects. → Fix: it only matched patterns in the examples; accuracy is how often it matched, not evidence of understanding.
What's next
Unit 2 — Data & Problem-Solving: you become a data explorer — collecting information, reading charts, and telling stories with data.